Why Is My Evaporator Coil Leaking?
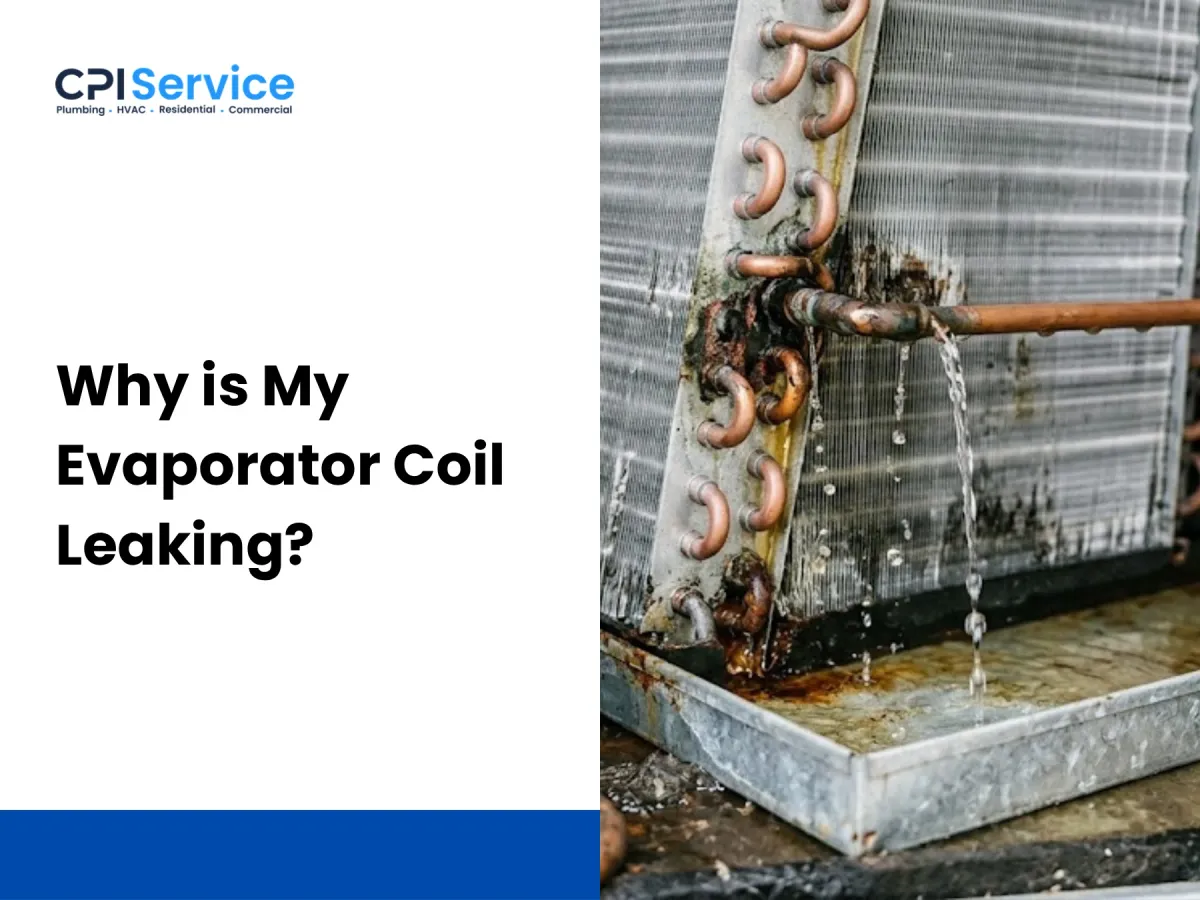
Table of Contents
- What Causes an Evaporator Coil to Leak?
- How Do Refrigerant Leaks and Water Leaks Differ?
- Symptoms of a Leaking Evaporator Coil
- What to Do If You Have a Leaking Evaporator Coil
- How to Prevent Evaporator Coil Leaks
- How Much Does It Cost to Fix a Leaking Evaporator Coil?
- Evaporator Coil Leaks in South Bay Homes
- When Should You Call an HVAC Technician?
- Frequently Asked Questions
An evaporator coil can “leak” in two ways. A refrigerant leak comes from corroded or damaged copper tubing, and the AC slowly loses cooling. A water leak means condensation can’t drain: a clogged drain line, a rusted-through pan or a melting frozen coil. In San Jose attics, it often shows up first as a ceiling stain.
Both need attention, but the fixes are very different. If you can’t tell whether the water is coming from the AC or a plumbing pipe, leak detection finds the source with minimal opening of walls and ceilings.
Poor maintenance, dirty filters, long exposure to humidity and household chemicals all make coil damage more likely. Small pinholes or cracks let refrigerant or water escape, and the AC starts to show warning signs: weak airflow, longer cooling cycles, uneven temperatures, frost on the coil and water around the indoor unit. Catching a leak early protects the compressor, keeps the system efficient and prevents water damage to ceilings, walls and floors.
What Causes an Evaporator Coil to Leak?
Most evaporator coil leaks come from corrosion, restricted airflow, a clogged drain or physical damage. Each one upsets the way the coil handles heat and moisture: refrigerant pressure becomes unstable, condensate can’t drain, or both. Knowing the cause tells you whether you’re dealing with a refrigerant problem, a water problem or an installation problem, and how urgent it is.
Corrosion of the Copper Tubing
Corrosion is the most common cause of refrigerant leaks. The coil relies on sealed copper tubing to carry refrigerant and absorb heat from the indoor air. Formicary corrosion eats microscopic tunnels through that copper. It’s triggered by chemicals in the air, such as volatile organic compounds (VOCs) from cleaners, paints, adhesives, insulation and new building materials, combined with moisture on the coil.
The damage builds slowly rather than causing a sudden failure. As refrigerant escapes, system pressure drops, cooling cycles get longer and energy use rises. The pinholes are too small to see, so the typical clue is weaker cooling with no visible water, which points to a leak inside the coil.
A Clogged Condensate Drain Line
As the coil removes heat and humidity from the air, it produces a steady stream of condensate that drains through a pan and a drain line. When dirt, algae or debris clog the line, the water has nowhere to go. It backs up, overflows the pan and leaks around the indoor unit, causing pooling and moisture damage.
This usually develops from skipped maintenance. The clue is water near the indoor unit while the AC runs, without hissing or a drop in cooling that would point to a refrigerant leak. See AC drain line clogged.
A Rusted or Damaged Drain Pan
The drain pan sits under the coil and directs condensate to the drain line. Years of standing water rust metal pans and crack plastic ones. Once the pan can’t hold water, even normal condensate leaks straight out of the air handler, damaging the surfaces around it.
The clue is water leaking even though the drain line is clear. That points to the pan as the source.
A Frozen Coil
Restricted airflow or low refrigerant can drop the coil’s temperature below freezing, so the condensation on it turns to ice. The ice blocks heat exchange and moisture removal. When the system cycles off or the ice thaws, it can release more water than the drain can handle, and the extra water overflows around the air handler. Dirty filters, blocked returns and a refrigerant leak are the usual reasons a coil freezes. See why an AC freezes up.
Physical Damage to the Coil
The coil’s thin copper tubing and closely spaced fins transfer heat well, but they’re easy to bend or puncture. Damage usually happens during installation, cleaning or other work near the unit. Once the tubing is opened, the sealed refrigerant circuit is broken: pressure drops, run cycles get longer and cooling becomes uneven. Watch for a drop in cooling together with hissing or oily residue near the coil.
Improper Installation
A coil has to be level, properly sealed and correctly connected to both the refrigerant lines and the condensate drain. Loose fittings, a poorly made brazed joint, a coil that isn’t level or a drain line without enough slope can cause refrigerant leaks or condensate overflow. These problems tend to show up soon after installation or repair, as recurring leaks or inconsistent cooling, and they keep putting stress on the system until the installation is corrected.
How Do Refrigerant Leaks and Water Leaks Differ?
A refrigerant leak is an invisible gas leak. It lowers system pressure and reduces cooling, and often leads to warm air or a frozen coil. A water leak is a visible liquid problem caused by a drain that can’t keep up: a blocked line, a damaged pan or melting ice. One affects how the AC cools; the other affects moisture control and the house around the unit.
| Refrigerant leak | Water leak | |
|---|---|---|
| What you notice | Weaker cooling, longer run times, ice on the coil or lines, sometimes hissing or oily spots | Water around the indoor unit, a wet ceiling or wall stain, the AC shutting off |
| Usual causes | Corrosion pinholes, physical damage, a bad joint | Clogged drain line, rusted or cracked drain pan, melting ice |
| Fix | Find and repair the leak, or replace the coil; recharge correctly | Clear the drain, replace the pan, fix why the coil froze |
| Who fixes it | A certified technician (refrigerant is regulated) | Often simpler; a technician can clear and test it |
Symptoms of a Leaking Evaporator Coil
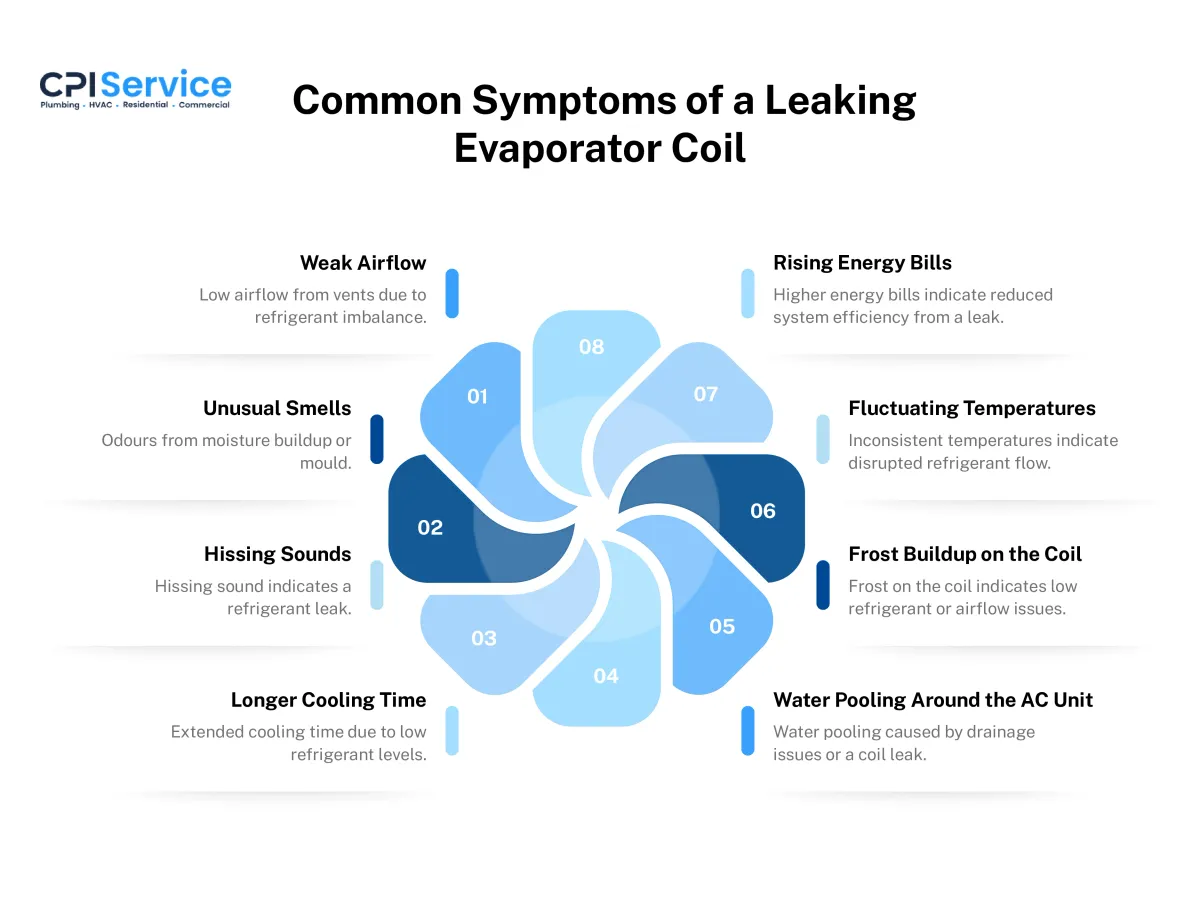
A leaking coil can no longer keep refrigerant flow or moisture under control, and the signs follow from that. Recognizing them early limits the damage.
- Weak airflow or warm air. As refrigerant drops, the coil absorbs less heat and airflow from the vents weakens. If filters, vents and ducts are clean and the airflow is still weak and the air not cold, suspect the coil.
- Unusual smells. A musty smell while the AC runs means moisture is building up inside the system, where it encourages mold and bacteria. If the smell returns every cycle, the source is inside the unit, not dust in the vents.
- Hissing sounds. A steady hiss near the indoor unit is refrigerant escaping under pressure through a crack or pinhole.
- Longer cooling cycles. With less refrigerant, the AC can’t reach the set temperature in a normal cycle, so it runs longer and strains the compressor and blower.
- Water pooling around the indoor unit. Condensate that should leave through the drain collects near the unit instead, from a clogged drain, melted ice or a failed pan. It can damage floors and walls and grow mold. See AC water leaks.
- Ice or frost on the coil or lines. Low refrigerant makes the coil too cold, so moisture freezes on it. Ice blocks airflow, and when it melts it adds to the water problem.
- Uneven temperatures. Some rooms cool quickly while others stay warm with the same thermostat setting, because the coil can’t absorb heat evenly.
- Rising energy bills. A higher bill with no change in use or settings means the AC is working longer and harder to do the same job.
What to Do If You Have a Leaking Evaporator Coil
- Turn the AC off if you see ice, hear hissing or find water spreading. Running it with a leak strains the compressor and can damage your home.
- Check the obvious water causes: a full drain pan, a clogged drain line, a dirty filter.
- Call a technician to find the source. For refrigerant leaks they use electronic leak detectors, bubble tests or pressure tests.
- Repair or replace. A leak at an accessible joint can sometimes be repaired. Corrosion leaks usually spread, so replacing the coil is often the lasting fix; on an older system, replacing the coil and outdoor unit together may be better value. See AC coil replacement cost.
Depending on the diagnosis, you’ll hear about three options. Only one of them is a permanent fix.
Adding Refrigerant as a Short-Term Fix
Recharging restores cooling for a while by replacing the refrigerant that leaked out, so the coil can absorb heat again. But the leak keeps losing refrigerant, so the improvement fades and you pay for refrigerant again. A recharge makes sense only to keep a system running briefly while a repair or replacement is scheduled. Refrigerant has to be handled by a technician with EPA Section 608 certification, and the charge has to match the manufacturer’s specifications: too much or too little damages the compressor.
Leak Sealants: Why We Don’t Recommend Them
Some products claim to seal small coil leaks from the inside by forming a barrier at the leak site. They don’t fix the cause, and we don’t recommend them. Sealants can clog the metering device and other small passages, can contaminate the equipment technicians use to recover refrigerant, and can void equipment warranties. A proper repair or a new coil is the reliable fix.
Replacing the Evaporator Coil
When a leak is severe or caused by corrosion, replacing the coil is the most effective solution. A new coil stops the refrigerant loss and restores heat absorption and steady cooling. The job involves recovering the refrigerant, removing the old coil, brazing in the new one, pressure-testing, pulling a vacuum and recharging, so it needs a certified HVAC technician. Done right, it protects the compressor and air handler from the strain a leaking coil puts on them.
How to Prevent Evaporator Coil Leaks
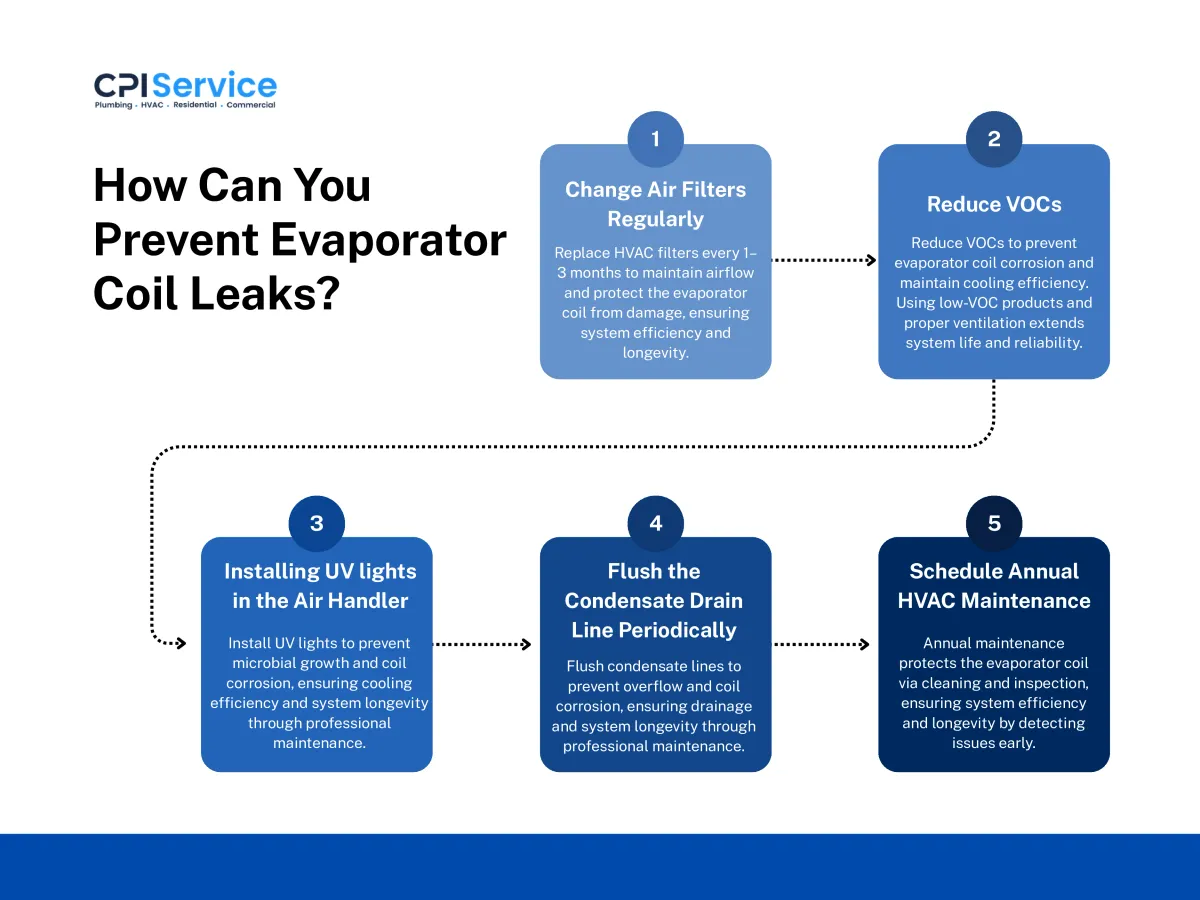
Preventing coil leaks comes down to clean airflow, clean air, a clear drain and regular checkups, so that small problems are fixed before they turn into leaks.
Change Air Filters Regularly
Replace or clean the filter every 1 to 3 months. A clean filter keeps airflow up and keeps dust and debris off the coil, so it absorbs heat efficiently without extra strain. A clogged filter restricts airflow, lowers efficiency, can freeze the coil and speeds up wear. Changing the filter is an easy homeowner job; a technician can confirm the right filter type and size for your system.
Reduce VOCs
Airborne chemicals contribute to the corrosion that causes most refrigerant leaks. Store paints, solvents and cleaning products outside the living space, ventilate when you use them, and choose low-VOC products where you can. This matters most during and after a remodel, and in homes with hobbies or businesses that use chemicals.
Install a UV Light in the Air Handler
A UV light mounted near the coil limits mold, algae and bacteria on its wet surfaces. That keeps the coil cleaner, helps heat transfer and reduces the moisture and slime that can lead to clogs and corrosion. It’s most useful in humid conditions or where growth has been a problem before. It doesn’t fix existing mechanical or refrigerant leaks, and it needs proper installation and periodic lamp replacement.
Flush the Condensate Drain Line Periodically
Flushing the drain line clears the algae, dirt and debris that build up inside it, before they cause an overflow, water damage or mold. A technician will also check that the line drains freely and has the right slope. Have it done during maintenance, and sooner if you notice water near the unit.
Schedule Annual HVAC Maintenance
An annual tune-up is the best way to catch a coil problem early. The technician inspects the system, cleans the coil, checks the refrigerant charge and airflow, and looks for signs of small leaks, corrosion or strain on components. Fixing those early avoids bigger repairs and keeps energy use down. Our membership plans include annual maintenance; see also AC tune-up cost and the HVAC maintenance checklist.
How Much Does It Cost to Fix a Leaking Evaporator Coil?
In San Jose, replacing a leaking evaporator coil typically costs $1,500 to $3,500, including the coil, refrigerant recovery and recharge, brazing, a vacuum and pressure test, and labor. Where a job falls in that range depends on the coil’s size and type, whether it’s under warranty, and how hard it is to reach (an attic air handler takes more labor than one in a garage). A water leak from a clogged drain line is usually a much smaller repair. CPI charges a $59 inspection fee to diagnose the problem, waived for CPI members, and quotes the repair as a fixed price before work starts. Dealing with a leak early keeps the cost down and protects the compressor and air handler.
| Situation | What you typically pay for | Typical San Jose price |
|---|---|---|
| Coil under the manufacturer’s warranty | Labor and refrigerant; the warranty covers the coil itself | Less than an out-of-warranty replacement |
| Coil out of warranty | The coil, refrigerant, brazing, testing and labor | $1,500–$3,500 |
| Full air handler replacement | A new air handler with its coil, removal of the old one, installation | More than a coil alone; quoted on site |
Cost Under Warranty
Many evaporator coils carry a manufacturer’s parts warranty, often longer when the equipment was registered after installation. If yours is covered, the coil itself is free and you pay mainly for the labor and refrigerant to install it. Labor and refrigerant usually aren’t covered, so check the warranty terms and the registration before the visit.
Cost Out of Warranty
Without warranty coverage, you pay for the whole job: the coil, diagnosis, refrigerant, brazing, testing and labor. Coil size, the type of coil, and access all affect the price, and hard-to-reach systems take more labor. That’s the $1,500 to $3,500 range above for a typical San Jose home.
Cost of a Full Air Handler Replacement
Sometimes the coil can’t be replaced on its own, for example when it’s built into an older air handler or the air handler is also failing. Then the air handler is replaced, which costs more than a coil alone: the price includes the new unit, removing the old one, installation and materials, and larger or harder-to-reach units cost more. We quote that on site. See evaporator coil replacement cost for more on what drives the price.
Is It Worth Replacing Just the Evaporator Coil?
Yes, when the coil is the only failed part and the air handler, outdoor unit and the rest of the system are in good condition, as is often the case on newer and mid-aged systems. Replacing the coil restores cooling and stops the leak for much less than a new system. On an older system with several failing parts or repeated leaks, a new coil may only buy time, and the money is often better put toward a new, more efficient system.
Evaporator Coil Leaks in South Bay Homes
- Attic air handlers. Many local homes have the furnace and coil in the attic. A clogged drain there shows up as a water stain on the ceiling below. A secondary drain pan with a float switch that shuts the AC off before water overflows is cheap insurance.
- Remodels and new materials. Fresh paint, adhesives, cabinets and flooring release VOCs that can contribute to coil corrosion. Ventilate well during and after a remodel, and replace the filter afterward.
- Long, quiet winters. Drain lines can dry out and gum up over the winter; have them checked at the spring tune-up.
When Should You Call an HVAC Technician?
Call a technician right away if you see ice on the coil or lines, hear hissing, feel warm air from the vents or find water around the indoor unit. Those are clear signs the coil needs professional attention. Changing the filter and checking for a full drain pan are fine for a homeowner, but anything involving refrigerant needs a certified technician, and DIY repairs on the coil can make the damage worse and the repair more expensive. A technician can find the leak, handle the refrigerant safely, repair or replace the coil and make sure the system runs efficiently afterward.
CPI Service diagnoses and repairs coil leaks throughout San Jose and the South Bay. Schedule AC repair, request a free estimate or call (408) 978-3093.
Frequently Asked Questions
Can a leaking evaporator coil be repaired?
Sometimes. A leak at an accessible joint can be repaired, but pinhole leaks from corrosion usually spread across the coil, so replacing the coil is often the lasting fix. On an older system, replacing the coil and outdoor unit together may make more sense.
Are refrigerant leak sealants a good idea?
We don't recommend them. Sealants can clog the metering device and other parts, may contaminate refrigerant recovery equipment and can void equipment warranties. A proper repair or coil replacement is the reliable fix.
Why is water leaking from my indoor AC unit?
Usually a clogged condensate drain line, a rusted or cracked drain pan, or a frozen coil melting faster than the drain can handle. These are water problems, not refrigerant leaks, and are often simpler to fix.
Is it safe to keep running the AC with a refrigerant leak?
It's best not to. Low refrigerant makes the compressor run hot and can freeze the coil. Turn the AC off and have the leak found and repaired.
How much does it cost to fix a leaking evaporator coil?
In San Jose, replacing an evaporator coil typically costs $1,500 to $3,500, including refrigerant recovery and recharge, brazing, testing and labor. A coil still under the manufacturer's parts warranty costs less, since you pay mainly for labor and refrigerant. A water leak from a clogged drain is usually a much smaller repair. CPI charges a $59 inspection fee to diagnose the problem, waived for members, and quotes the repair as a fixed price before work starts.
Is it worth replacing just the evaporator coil?
Usually yes on a newer or mid-aged system where the coil is the only failed part, especially under warranty. On an older system with other failing parts or repeated leaks, the coil money is often better put toward a new system.
CPI Service is a great company to use for HVAC too! Our A/C stopped working during the recent heatwave & another company wanted to replace our whole unit. Then we called CPI & they found it didn’t need to be replaced, they fixed it that day! I really appreciate a company that responds quickly, is very professional & reasonably priced!!! I’ll be using them for sure in the future.
Jaycee V., Google review
Read more reviews →Serving San Jose and the South Bay
CPI Service is based at 2880 Aiello Dr in San Jose and serves homes and businesses across the South Bay and the Peninsula. See all the areas we serve.